1.安装扩展
composer require leonis/easysms-notification-channel
此扩展是基于easysms的.
2.创建配置文件
php artisan vendor:publish --provider="Leonis\Notifications\EasySms\EasySmsChannelServiceProvider"
会生成config/easysms.php
<?php
/*
* This file is part of the leonis/easysms-notification-channel.
* (c) yangliulnn <yangliulnn@163.com>
* This source file is subject to the MIT license that is bundled
* with this source code in the file LICENSE.
*/
return [
// HTTP 请求的超时时间(秒)
'timeout' => 5.0,
// 默认发送配置
'default' => [
// 网关调用策略,默认:顺序调用
'strategy' => \Overtrue\EasySms\Strategies\OrderStrategy::class,
// 默认可用的发送网关
'gateways' => [
'aliyun',
'errorlog',
],
],
// 可用的网关配置
'gateways' => [
// 失败日志
'errorlog' => [
'channel' => 'smslog',
],
// 阿里云 这三个值得获取看下面操作
'aliyun' => [
'access_key_id' => '',
'access_key_secret' => '',
'sign_name' => '',
],
// ...
],
'custom_gateways' => [
'errorlog' => \Leonis\Notifications\EasySms\Gateways\ErrorLogGateway::class,
'winic' => \Leonis\Notifications\EasySms\Gateways\WinicGateway::class,
],
];
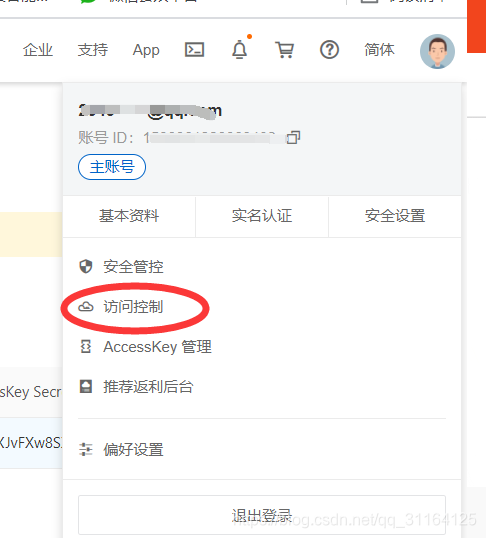
3.获取上面的三个参数
登录阿里云,进入短信服务

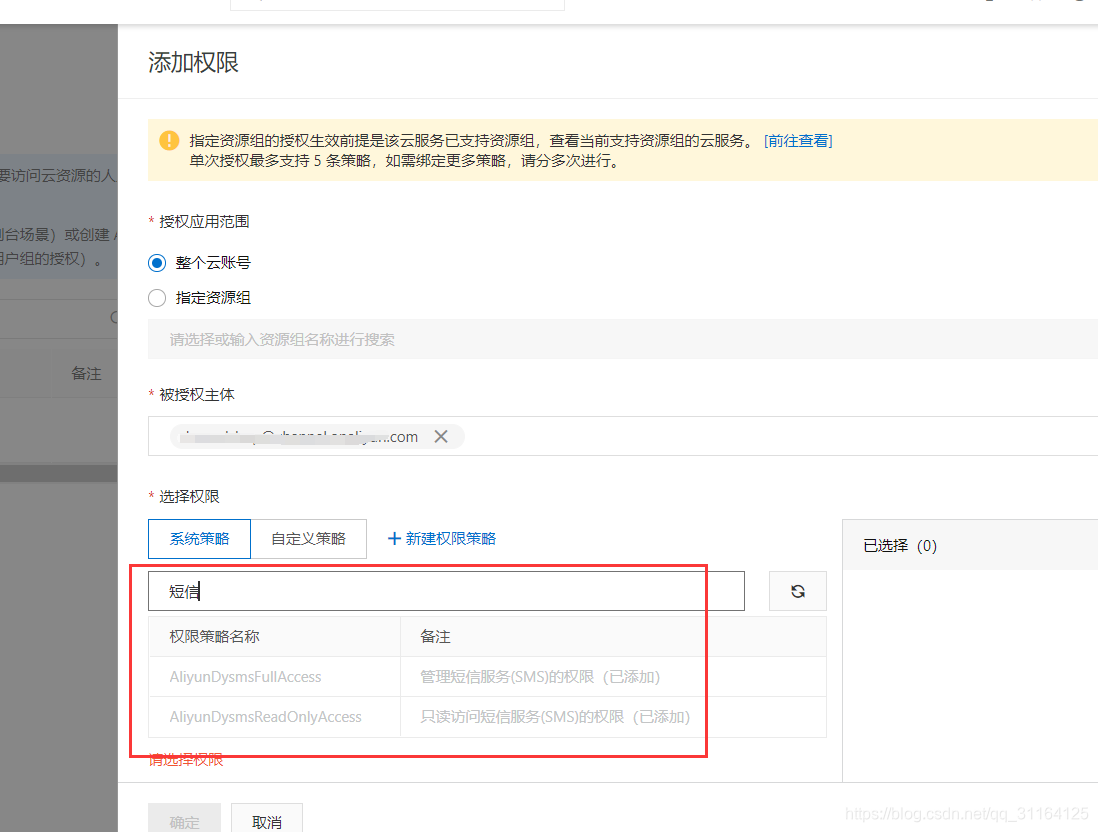
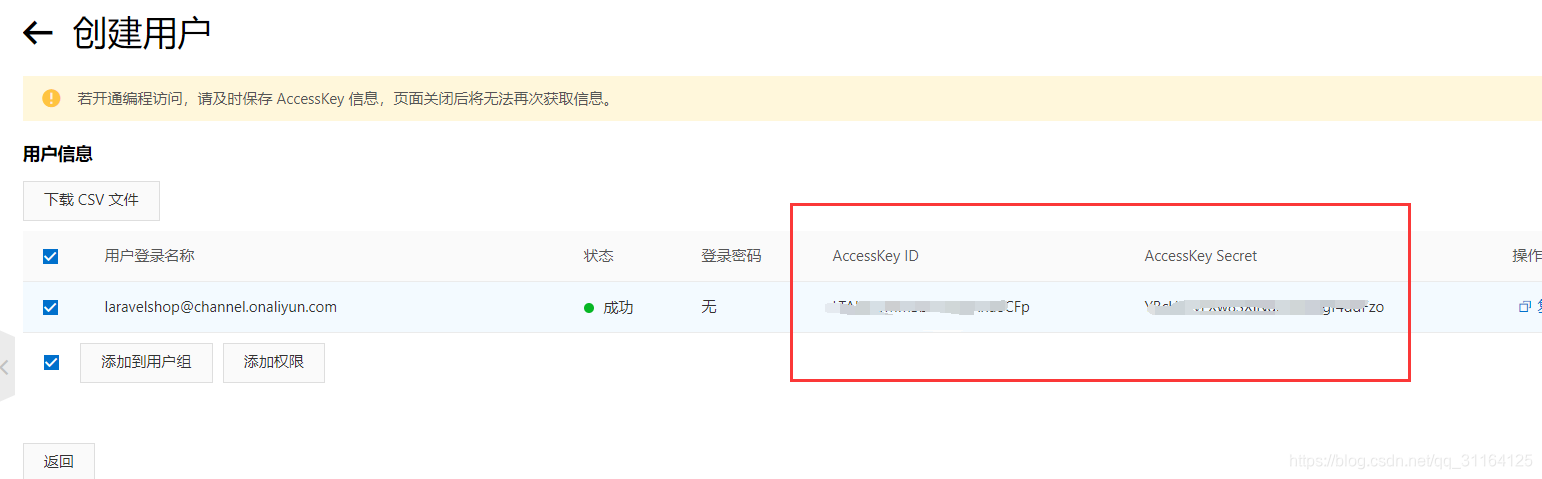
保存这两个值,这两个填入上面的路径
还缺一个
sign_name 这个就是签名
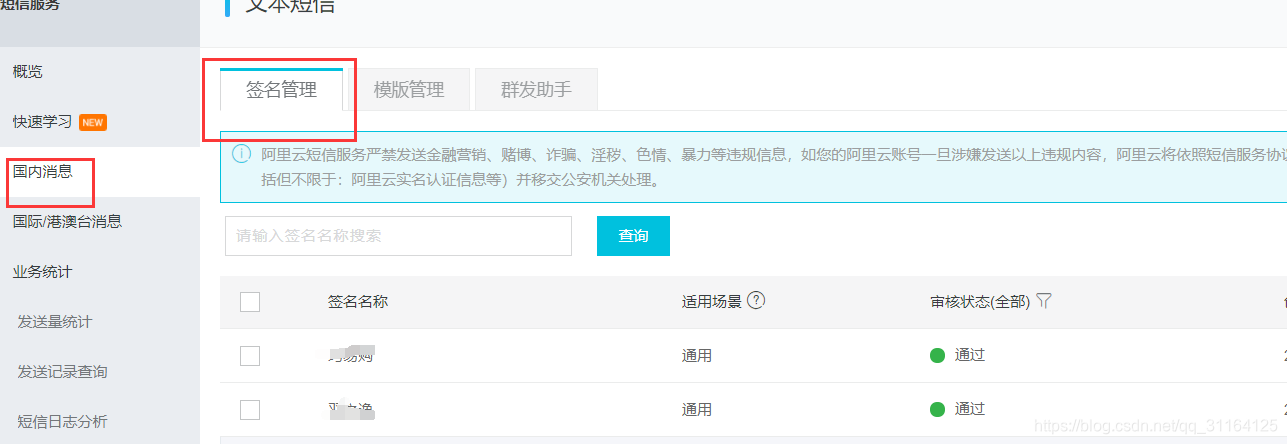
没用就申请,然后选一个填入阿里云配置处
4.生成消息文件
php artisan make:notification VerificationCode
<?php
namespace App\Notifications;
use Illuminate\Bus\Queueable;
use Illuminate\Contracts\Queue\ShouldQueue;
use Illuminate\Notifications\Messages\MailMessage;
use Illuminate\Notifications\Notification;
use Leonis\Notifications\EasySms\Channels\EasySmsChannel;
use Leonis\Notifications\EasySms\Messages\EasySmsMessage;
// implements ShouldQueue 这个引入了就是启用队列
class VerificationCode extends Notification implements ShouldQueue
{
use Queueable;
private $code;
/**
* Create a new notification instance.
*
* @return void
*/
public function __construct($code)
{
//
$this->code = $code;
}
/**
* Get the notification's delivery channels.
*
* @param mixed $notifiable
* @return array
*/
public function via($notifiable)
{
return [EasySmsChannel::class];
}
/**
* Get the mail representation of the notification.
*
* @param mixed $notifiable
* @return \Illuminate\Notifications\Messages\MailMessage
*/
public function toEasySms($notifiable)
{
return (new EasySmsMessage())
// ->setContent('您的验证码为: 6379')
->setTemplate('SMS_57435079') //模板消息也是要去申请然后填写模板ID在这里
->setData(['code' => $this->code,'product'=>'laravel_shop']);
}
/**
* Get the array representation of the notification.
*
* @param mixed $notifiable
* @return array
*/
public function toArray($notifiable)
{
return [
//
];
}
}
5.新建一个控制器,新建一个方法
use Illuminate\Support\Facades\Notification;
//记住这里要引入这个类
public function sendCaptchaMsg(string $mobile,string $code)
{
// if(app()->environment('testing')){
// return ;
// }
//发送短信
Notification::route(EasySmsChannel::class,
new PhoneNumber($mobile,86)
)->notify(new VerificationCode($code));
}
6.开启队列为redis 然后写一个功能测试 tests/AuthTest.php 没有就自己新建
QUEUE_CONNECTION=redis //env文件
/**
* 发送验证码测试
*/
public function testRegCaptcha()
{
// dd(app()->environment());
$response = $this->post('wx/auth/regCaptcha',[
'mobile'=>'',
]);
$response->assertJson(['error'=>0,'errmsg'=>'成功','data'=>null]);
// $response = $this->post('wx/auth/regCaptcha',[
// 'mobile'=>'',
// ]);
// $response->assertJson(['error'=>702,'errmsg'=>'验证码未超时1分钟,不能发送']);
}
7.开启队列
php artisan queue:work
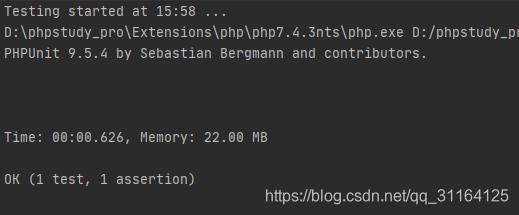
8.运行测试方法
测试返回
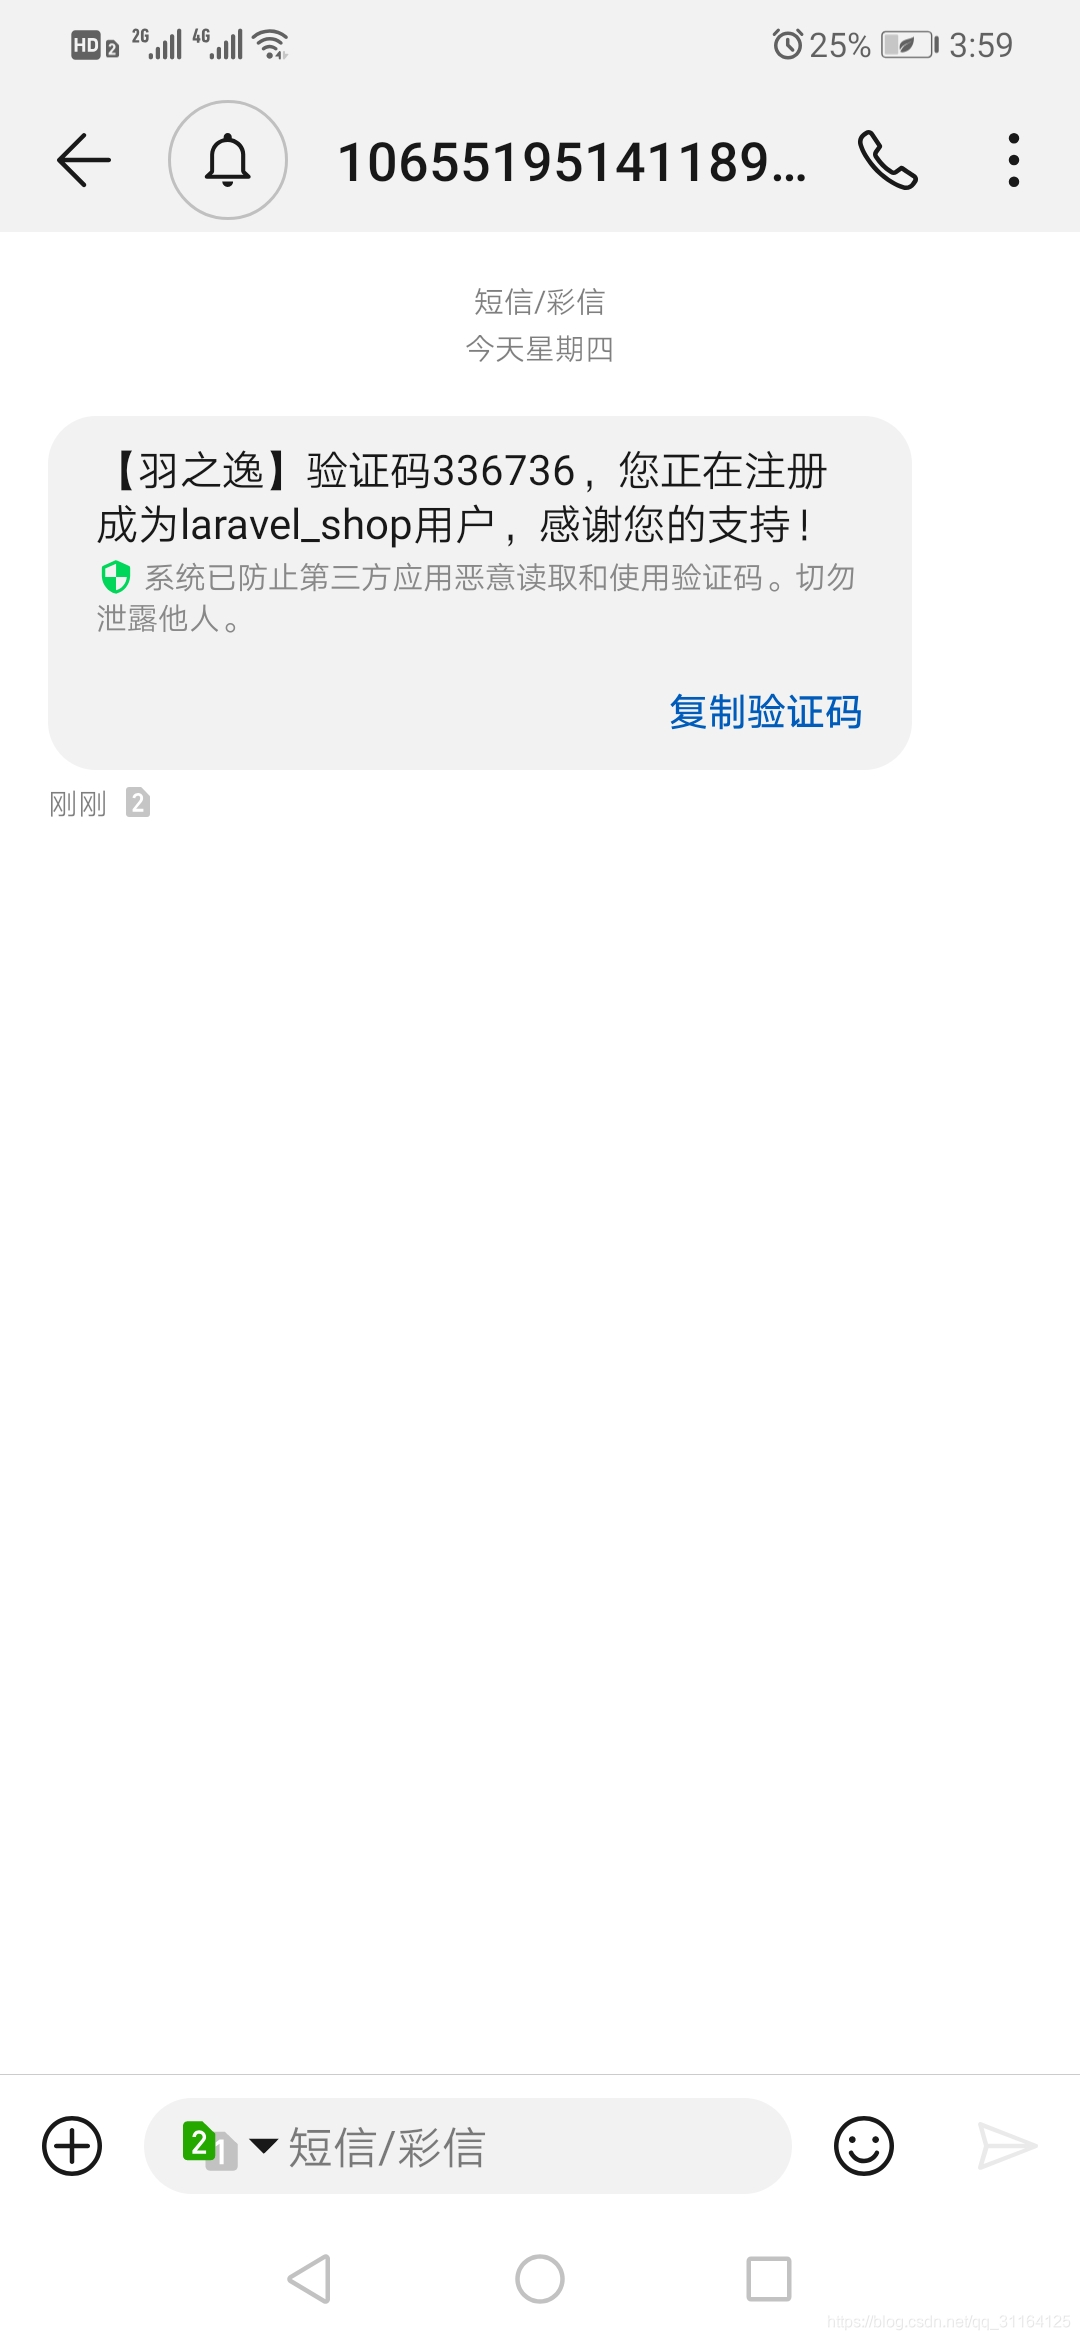
队列

消息
 提供
提供